We assume you have a
https://dadup.eu account. If not, order one. Then you have to create a bucket. You may use
Dragondisk.
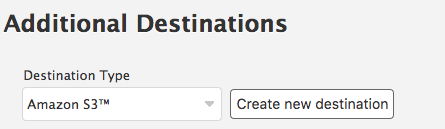
In the WHM console, click Backup Configuration, and scroll to the
bottom looking for additional destinations. Since daDup.eu is Amazon S3 compatible, you may select Amazon S3 in the
Destination Type and Create new destination.
While configuring it, give it a name and
select the box that says transfer system backups to destination (traffic to daDup is encrypted so it is safe to select it).
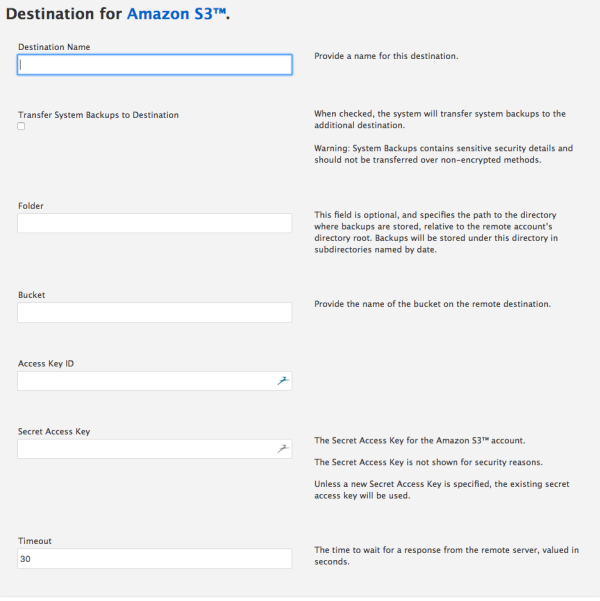
Enter the name of the bucket you created earlier, access Key ID, and secret access key
found in
https://admin.tuxis.nl, followed by save and validate destination.
Assuming you did everything correct, it should appear as an additional
destination at the end of your backup configuration. Click Save
Configuration and you’re done. Backups will automatically be transferred
to daDup.eu as soon as they are done. You may run a test backup an check with Dragondisk if data is written on daDup.eu
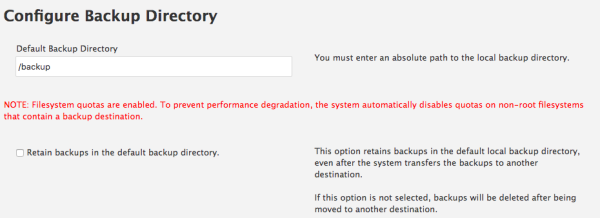
One final choice is whether or not to leave the backups on the local
drive for quick restores. Feel free to do that if you have the space. To
do that, just click
Retain backups in the default backup directory.