How to create a virtual private server (VPS) in Portal.
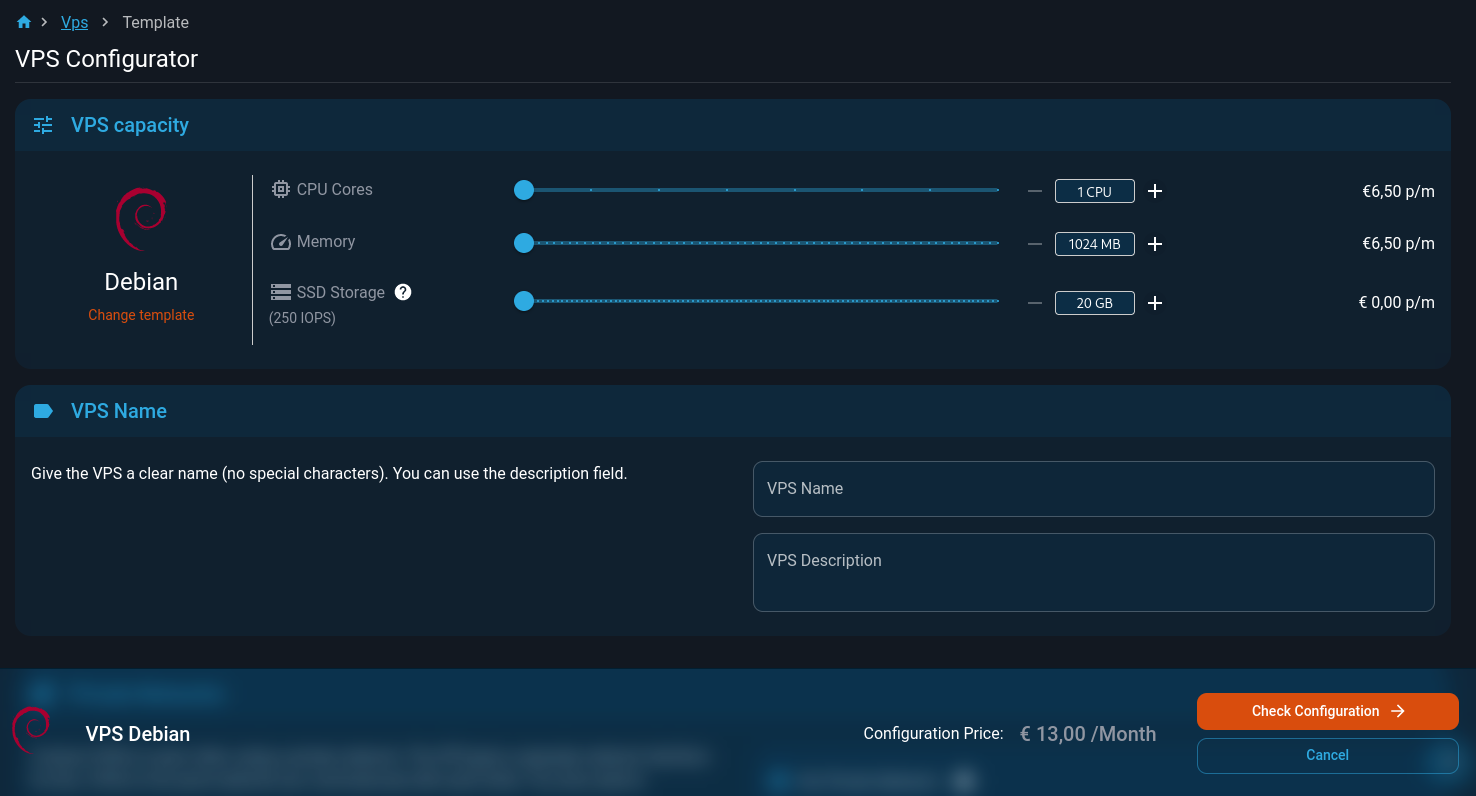
You can configure a VPS completely as you wish. The configurable options are:
- CPU cores
- Memory
- SSD storage, up to 1TB
- Name
- Private network
- IPv6 and/or IPv4
- The amount of snapshots
- SLA
- SSH access for Tuxis employees
You can create a VPS by following the steps below.
Step by step guide
- Login at portal.tuxis.cloud
- Click on "Virtual private servers"
- Click on "Create"
- Select the operating system or application you want to order
- Configure the VPS to suit your needs
Example:
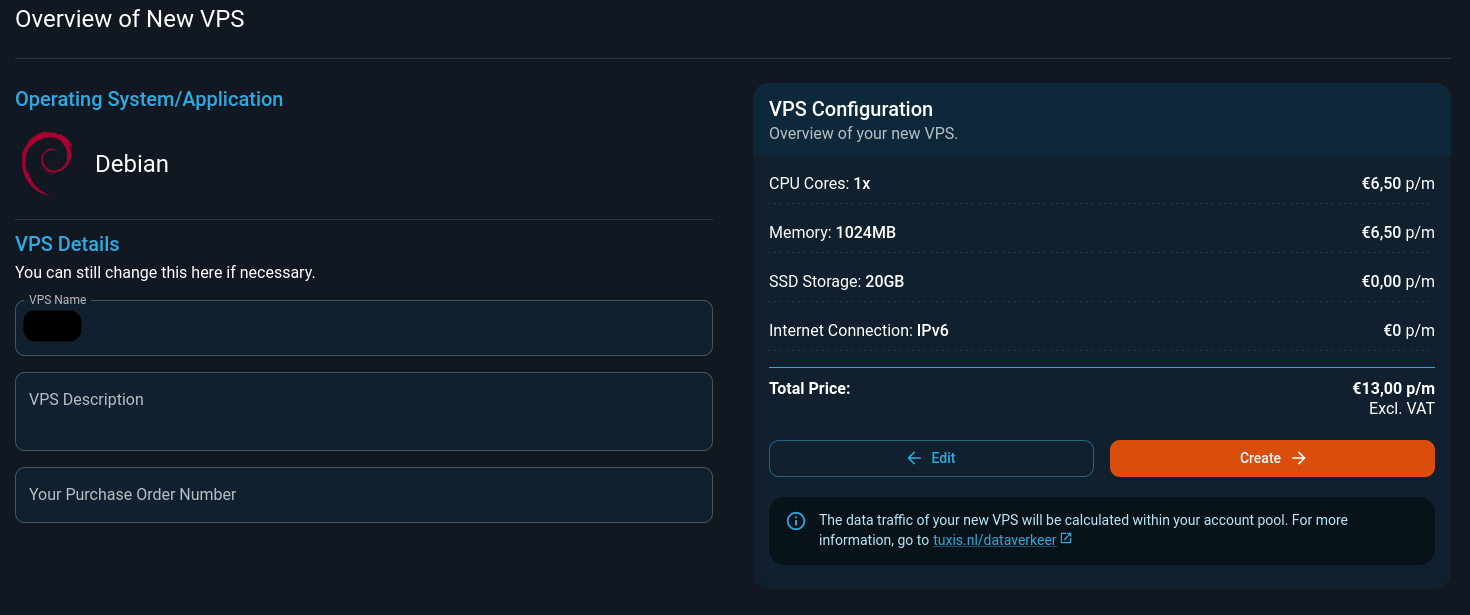
- When you are done, click "Check configuration"
- If all settings are as required, click "Create"
- The VPS is being deployed.